

Getting a Jira project off the ground isn't about knowing every single feature inside and out. It's about laying a solid foundation right from the start. The choices you make in the first few minutes—before a single ticket is even created—will shape how your team works, collaborates, and ultimately, succeeds.
Let's walk through the critical, actionable steps to build a Jira environment that’s structured enough to keep you on track but flexible enough to adapt.
Building Your Foundation in Jira
When you first click "Create Project" in Jira, the sheer number of options can feel a bit much. But don't get lost in the noise. Every successful setup hinges on a couple of core decisions you make at the very beginning.
These foundational pieces, your project templates and schemes, are the blueprint for how work gets done. Get them right, and you pave the way for a smooth workflow. Get them wrong, and you're setting your team up for confusion and rework down the line. A poorly chosen template or a confusing workflow creates friction, slows everyone down, and can even lead to people abandoning the tool altogether.
That’s why understanding the why behind each setting is just as important as knowing how to click the buttons.
Choosing the Right Project Template
Your first big decision is the project template. This choice defines your team's entire workspace, so it needs to line up with how you actually manage projects. For most teams, it boils down to two main options: Scrum or Kanban.
Scrum Template: This is your go-to if your team works in iterative cycles, or sprints. Does your team plan work in fixed periods, like two-week blocks? Do you aim to deliver a working piece of the project at the end of each cycle? If you're doing ceremonies like sprint planning and retrospectives, Scrum is the natural fit. It’s built for that predictable, structured rhythm.
- Actionable Step: When creating your project, select "Scrum". In the project settings, immediately navigate to "Board Settings" and configure your sprint duration (e.g., 2 weeks) and start day. This simple step aligns the tool with your team's cadence from day one.
Kanban Template: This template is all about continuous flow. It’s perfect for teams where work arrives a bit more unpredictably, like service desks or operations teams. The goal here isn't to fill a sprint but to manage the workload and limit how much is in progress at any one time. Work is simply pulled from a backlog as the team has capacity. No sprints, just a steady stream of tasks.
- Actionable Step: After selecting the "Kanban" template, go to your board's configuration and set Work-in-Progress (WIP) limits for your "In Progress" columns. For example, set a limit of 3 tasks per person to prevent multitasking and identify bottlenecks early.
Here's what that choice looks like when you're getting started in Jira's interface.
This view shows how Jira caters to different ways of working, from software development to marketing and HR.
Choosing the right template is your first and most important step. To help you decide, here’s a quick breakdown of the most common options.
Choosing Your Jira Project Template
A comparison of the most common Jira project templates to help you decide which is best suited for your team's methodology and goals.
| Template Type | Best For | Key Features | Example Use Case |
|---|---|---|---|
| Scrum | Teams working in fixed-length sprints with planned deliverables. | Sprints, Backlog, Velocity Charts, Story Points | A software team building a new feature in two-week cycles. |
| Kanban | Teams prioritising continuous flow and managing incoming work. | Kanban Board, Work-in-Progress (WIP) Limits, Control Charts | An IT support team handling incoming service tickets. |
| Bug Tracking | Teams focused on identifying, triaging, and resolving software defects. | Simplified workflow (To Do, In Progress, Done), Priority Fields | A QA team managing bugs reported during a product release. |
| Work Management | Business teams (HR, Marketing, Finance) managing tasks and projects. | Lists, Calendars, Timelines, Simple Workflows | A marketing team planning and executing a new product launch campaign. |
Once you’ve landed on a template that matches your team’s rhythm, you’re ready for the next layer of customisation.
Configuring Essential Project Schemes
With your template selected, it’s time to look at schemes. Think of schemes as a bundle of settings—like issue types, workflows, and permissions—that can be shared across multiple projects. They're what bring consistency and control to your Jira instance. Get your schemes set up properly, and you’ve built the backbone of an effective project.
A common mistake is just accepting the default schemes without a second thought. This almost always leads to a workflow that doesn't quite fit how your team actually works, creating extra steps where you don't need them and missing ones that are crucial.
For example, a software development team probably needs issue types like 'Bug', 'Story', 'Task', and 'Epic', each with its own specific workflow. A marketing team, on the other hand, might be better off with 'Content Piece', 'Campaign', and 'Creative Request'. Defining these early on is critical.
Actionable Step: Go to "Project Settings" > "Issue Types". Click "Add Issue Type" and create one or two custom types that reflect your team's unique work (e.g., "User Interview", "Marketing Asset"). This immediately makes Jira's language match your team's language.
These individual pieces all fit into the bigger picture of your project plan. If you want to see how this works on a larger scale, it’s worth exploring different work breakdown structure examples for project management.
Jira's deep customisation is a major reason why it dominates the market, holding around 42% of the global share, according to 2025 data. This flexibility is what makes it so powerful for IT and software companies that live and breathe agile. You can dive deeper into these Jira statistics and market trends to see just how widespread its adoption is.
Designing Workflows That Actually Work
A good Jira workflow isn't just a series of statuses. It's a digital mirror of how your team actually gets things done, from a scribbled idea to a finished product. If you stick with the out-of-the-box settings, you're missing the point. The goal is to build a process that feels natural and supportive—one that helps your team, not one that forces them into frustrating digital corners.
This all starts with speaking the same language. Not every piece of work is just an "issue." By creating custom issue types—like ‘Bug,’ ‘Task,’ ‘Story,’ or even something specific like ‘Content Brief’—you make Jira feel like it was built for your team. It’s a small change, but it makes the entire system more intuitive from day one.
This infographic lays out the core sequence for a solid Jira setup, moving from the big picture down to the nitty-gritty of your process.
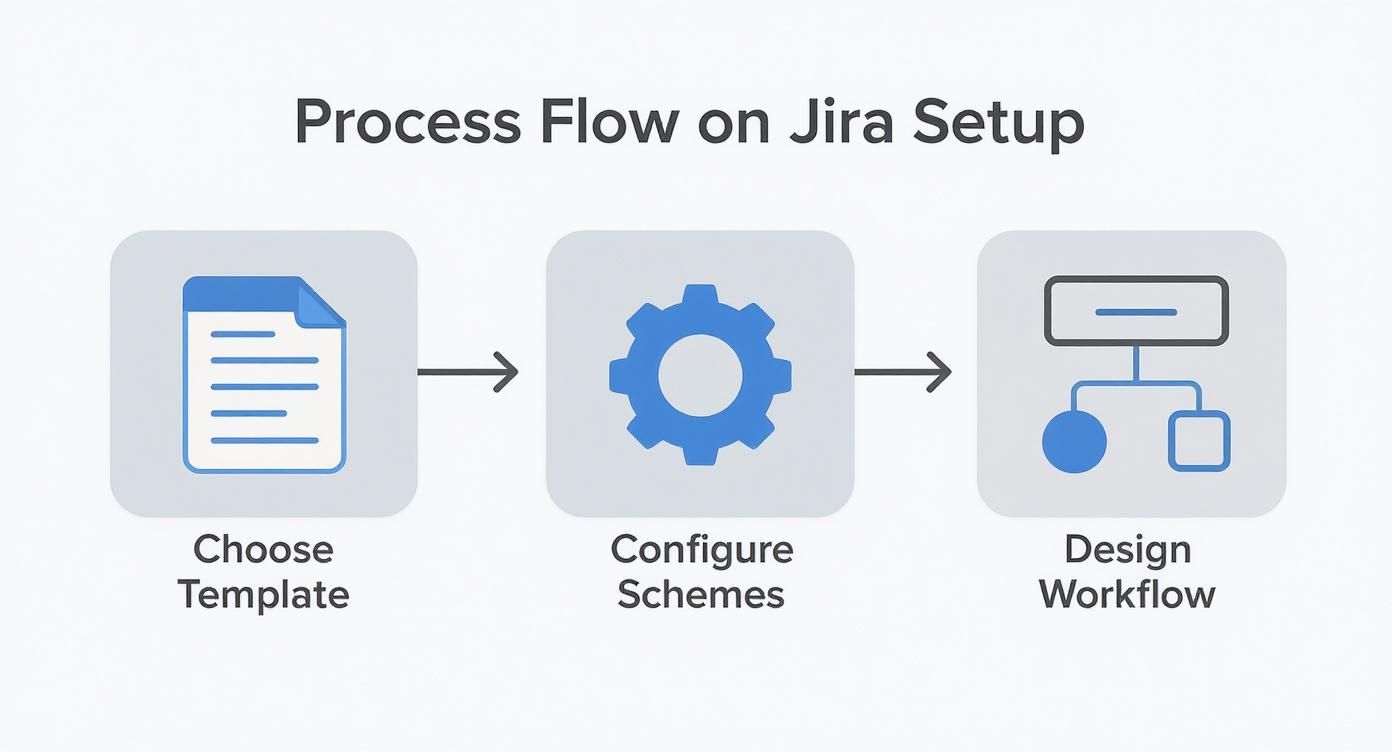
The flow from template to schemes to workflow isn't accidental. It’s a methodical approach that makes sure you have a solid foundation before you start drawing boxes and arrows.
Mapping Your Team's Real-Life Process
Once you've defined your issue types, it's time to map out the real journey a task takes. What are the key stages it has to pass through? These stages become your workflow statuses.
For a lot of teams, a simple workflow is all you need:
- To Do: Ready to be picked up.
- In Progress: Someone is actively working on it.
- In Review: It's done, but needs a second pair of eyes.
- Done: Finished and meets all the criteria.
But what if your process is more complex? A content team, for instance, has a very different path to get an article from an idea to a published post.
Your workflow has to reflect reality. If a task always goes through a "Legal Review" or "Design Approval" stage, add those statuses. Forcing a real-world process into a generic workflow just leads to confusion, and tickets get stuck in the wrong column.
This kind of tailoring is especially important in regulated fields. Here in the Netherlands, for example, we've seen a lot of mid-sized healthcare teams adopt Jira. They often start by building meticulous workflows for compliance tasks, like managing training logs. It's a smart way to show immediate value while meeting strict regulatory needs. You can actually read more about how Dutch healthcare teams are adopting Jira on nyxwolves.com.
A Practical Workflow Example
Let's walk through building a workflow for a content marketing team. Their process takes a piece of work from a simple idea to a published blog post, and every step needs a clear owner.
Custom Issue Type: Content Piece
Workflow Statuses:
- Idea: A new content idea logged in the backlog.
- Briefing: The content strategist fleshes out a detailed brief.
- Writing in Progress: The writer is drafting the content.
- Editorial Review: The draft is with the editor for feedback.
- Design Queue: Approved text moves to the design team for visuals.
- Ready for Publish: The final piece is staged and waiting for its go-live date.
- Published: The content is live on the site.
Each jump between these statuses is a transition. This is where you can get really clever. You can add rules to these transitions to make your workflow smarter. For instance, you could add a condition so a 'Content Piece' can't move from "Writing in Progress" to "Editorial Review" unless a document link has been added to the ticket.
Actionable Step: To implement this, edit your workflow. Click on the transition from "Writing in Progress" to "Editorial Review" and select "Validators". Add the "Field Required Validator" and apply it to a field like "Attachment" or a custom "Document Link" field. Now, Jira enforces your process automatically.
This kind of detail gets rid of ambiguity. The writer knows exactly when their job is done, the editor sees a clean queue of what’s ready for them, and the designer has a clear view of their upcoming work. It prevents bottlenecks and ensures everyone understands the full lifecycle of their work.
When you design a workflow that truly works for your team, you turn Jira from a simple task tracker into a powerful engine for getting work done.
Once you’ve defined how your team works with a custom workflow, the next logical step is to visualise it. For any agile team, the Jira board—whether it’s Scrum or Kanban—is the single source of truth. It's much more than a task list; it's a living, breathing picture of your progress, bottlenecks, and priorities.
A well-set-up board can genuinely change how your team interacts with their work, turning project management from a simple tracking exercise into a truly collaborative hub.
The real magic of a board lies in mapping your workflow statuses to columns. This is the connection that brings your process to life. For instance, your workflow might have several distinct statuses like 'Briefing,' 'Writing in Progress,' and 'Editorial Review.' You could map all three of these to a single board column called 'In Progress' to keep the view clean, or you could give each status its own column for a more granular look.
The key is to make it intuitive. When someone on your team glances at the board, they should instantly grasp what’s happening without needing a translation guide.

Organising Work with Swimlanes and Filters
Beyond the basic columns, you can layer on more organisation to bring even greater clarity. Swimlanes are a fantastic way to do this. They are horizontal rows that group issues based on criteria you define, helping teams focus on different streams of work at the same time.
You could set up swimlanes to group tasks by:
- Epics: This is great for seeing all the related stories and tasks for a major feature in one place, giving you a clear view of progress on big-ticket items.
- Assignees: Perfect for daily stand-ups, this setup shows exactly what each person is juggling.
- Priorities: This automatically floats the highest-priority items to the top of each column, so everyone knows what to tackle first.
Quick Filters are another game-changer. These are essentially saved searches using JQL (Jira Query Language) that let your team instantly slice and dice the board view. A developer could click a "My Work" filter to see only their assigned issues, or a tester could use a "Ready for Testing" filter to isolate tickets in that specific status. It cuts through the noise and helps everyone focus on what’s relevant to them, right now.
Actionable Step: Go to "Board Settings" > "Quick Filters". Create a new filter named "My Open Issues" with the JQL assignee = currentUser() AND resolution = Unresolved. This one filter will become the most-used feature for every person on your team.
Managing Sprints for Scrum Teams
If you're running a Scrum board, sprint management is your bread and butter. In Jira, a sprint is a fixed-length iteration where the team commits to completing a set amount of work. The board is command central for this entire process, from planning right through to the final review.
It all starts with backlog grooming, where the team gets together to review, estimate, and prioritise user stories. Then, during sprint planning, you'll literally drag a selection of these stories from the backlog into a new sprint, locking in the scope for the next one to four weeks. Using story points here helps the team get a feel for their capacity and commit to a realistic workload.
Once the sprint kicks off, that board becomes the team's daily focal point. It’s what you’ll gather around (physically or virtually) for stand-ups to talk through progress and flag blockers. Because it’s so visual, you can easily spot if work is flowing smoothly or if tasks are starting to pile up in one column—a classic sign of a bottleneck.
A common pitfall I see is teams treating their sprint commitment as completely inflexible. The board should be a living tool. If business priorities shift or an urgent bug pops up, the team should feel empowered to adjust the sprint, as long as they document the change to discuss in the retrospective.
By getting comfortable with board configurations, you can turn a simple task tracker into an active, intelligent guide for your team. To see how this works in practice, check out a guide to agile project management with Jira—it offers some excellent, real-world insights for keeping your projects on track.
Using Automation and Reporting for Deeper Insights
Setting up your Jira boards and workflows gives your team a solid foundation, but the real magic happens when you make Jira start working for you. To truly get the most out of it, you need to move beyond simple manual tracking and start making data-driven decisions. This is where automation and reporting come in, transforming your Jira instance from a digital filing cabinet into an intelligent assistant.
Let's dig into how you can use these features to claw back time, slash human error, and get the insights you need to keep your team improving.

Putting Repetitive Tasks on Autopilot
Jira Automation is a surprisingly powerful, no-code engine that lets you build simple "if this, then that" rules to handle all the boring, routine tasks. Every minute someone spends updating a ticket is a minute they're not spending on actual, valuable work. Automation hands that administrative busywork back to the machine, ensuring your processes are followed consistently every single time.
Think about it: a new bug gets reported. Instead of a developer manually creating sub-tasks to investigate, fix, and test, an automation rule can spin them up instantly. This doesn't just save a few clicks; it enforces your team's standard process for every single bug, without fail.
You can set up some incredibly useful rules in just a few minutes. Here are a few that have a big impact right away:
- Auto-Close Sub-Tasks: When a parent ticket (like a user story) moves to "Done," a rule can automatically transition all its sub-tasks to "Done" as well. No more manual cleanup at the end of a sprint.
- Assign Issues by Category: Create a rule that assigns new tickets to a specific person or team based on the 'Component' or 'Label' field. For example, any issue with the "UI/UX" component gets automatically assigned to your lead designer.
- Send Proactive Alerts: You can have a rule send a message to a Slack channel whenever a new issue with "Highest" priority is created. This ensures critical issues get eyes on them immediately, no board-watching required.
Many of these principles are central to effective workflow automation in product management, where the goal is to drive faster, more reliable releases.
Here’s a quick-start guide to some of the most useful rules you can implement today.
Essential Jira Automation Rules for Project Managers
Setting up a few key automation rules is one of the fastest ways to reclaim time and add consistency to your workflow. The table below outlines some high-impact examples that require minimal setup but deliver significant value by handling repetitive administrative tasks.
| Automation Rule | Trigger | Action | Benefit |
|---|---|---|---|
| Auto-Close Child Issues | When parent issue is transitioned to 'Done' | Transition all sub-tasks to 'Done' | Saves time and prevents forgotten sub-tasks cluttering the board. |
| Smart Issue Assignment | When issue is created with a specific 'Component' | Assign issue to a pre-defined user or group | Ensures tickets go to the right person instantly without manual triage. |
| Priority Alert | When issue is created or updated to 'Highest' priority | Send a notification to a Slack or Teams channel | Guarantees immediate visibility for critical issues. |
| Stale Issue Reminder | When an issue has not been updated in 14 days | Add a comment pinging the assignee and add a 'Stale' label | Prevents work from falling through the cracks and prompts follow-up. |
By implementing just a couple of these, you'll immediately feel the reduction in manual overhead, letting your team focus on the work that actually matters.
Visualising Your Progress with Dashboards and Reports
Automation keeps your data clean; reporting is how you make sense of it all. A well-designed Jira dashboard gives you a live, at-a-glance view of your project's health, team performance, and any looming roadblocks. The key is to show the right information to the right people at the right time.
Don't fall into the trap of building a one-size-fits-all dashboard. Your development team cares about sprint burndown charts and bug counts. Your CEO probably just wants to see high-level epic progress and release timelines. Always tailor your dashboards to the audience.
It's surprising how many teams miss this. Recent 2025 statistics show that only about 23% of project management professionals in the Netherlands use dedicated tools like Jira, even though 77% of high-performing projects depend on them. And of those who do use them, around 54% struggle with tracking real-time project KPIs—a gap that Jira's reports are built to fill.
Key Reports Every Project Manager Should Master
Jira is packed with reports, but you can get a huge amount of value from just a few core ones:
- Burndown Chart: This is your go-to for tracking progress within a sprint. It shows the work remaining versus the time left, making it painfully obvious if you're on track to hit your sprint goal.
- Actionable Step: During daily stand-ups, have the Burndown Chart visible. If the line trends above the ideal guideline for more than two consecutive days, it's a clear signal to discuss blockers or scope adjustments immediately.
- Velocity Chart: This report calculates the average amount of work your team gets done per sprint. After a few sprints, it becomes an incredibly reliable tool for predicting future capacity, which makes your sprint planning much more realistic.
- Cumulative Flow Diagram (CFD): This is your secret weapon for spotting bottlenecks. The CFD visualises the number of issues in each workflow status over time. If you see one column (like "In Review") getting wider and wider, that's a crystal-clear signal that work is piling up and something in your process needs attention.
Combining smart automation with these insightful reports is how you turn Jira from a passive chore into an active partner in your project's success. It’s a fundamental step if you're serious about moving from raw data to actionable decisions that actually improve how your team works.
Driving Adoption and Managing Permissions
Even the most perfectly configured Jira instance is worthless if your team doesn't use it—or worse, uses it incorrectly. Once the workflows and boards are built, the real work begins. Your focus has to shift to the human side of project management in Jira: making sure people can, and actually want, to use the tool effectively. It’s a delicate balance between smart permissions and a real strategy to get people on board.
Getting permissions right is your first line of defence against chaos. You need to give people enough access to do their jobs without hitting a wall, but not so much that they can accidentally break a workflow or stumble into sensitive information. This is where Jira's roles and permission schemes are your best friend.
Structuring Access with Roles and Permissions
Instead of giving permissions to individual users one by one—a recipe for an administrative nightmare—Jira encourages a role-based approach. You define roles for your project (like ‘Developer’, ‘Tester’, or ‘Project Manager’) and then assign specific permissions to those roles.
A classic mistake I see all the time is giving everyone broad 'Project Admin' access just to "make things easier." This almost always backfires, leading to inconsistent setups, broken workflows, and a cluttered instance that becomes a pain to manage. The goal is to let your permissions enforce the process, not undermine it.
A solid starting point for a software team might look something like this:
- Developers: Can create and transition issues, log time, and manage their assigned work. Crucially, they can't edit workflows or change project settings.
- Testers (QA): Have similar permissions to developers but can also create bug reports and move issues through testing-specific statuses.
- Project Managers: Can manage sprints, edit project versions, and run reports. They have wider admin rights but might not be able to change the core permission schemes.
Actionable Step: In "Project Settings" > "People", add team members to predefined roles instead of granting individual permissions. If a standard role doesn't fit, go to your global Jira Settings > "Roles" and create a new one (e.g., "Stakeholder") before assigning permissions to it.
This kind of granular control keeps your project’s integrity intact. If you want to dive deeper into assigning these responsibilities clearly, a Responsibility Assignment Matrix can provide a helpful framework.
Moving Beyond Logins to Measure True Adoption
Just seeing that people are logging in tells you next to nothing. Real adoption means Jira has become a natural part of their daily work, not just another tool they begrudgingly update once a week to keep their manager happy. To see what’s really going on, you need to look at interaction data.
Are people just dragging tickets from 'To Do' to 'Done'? Or are they actively using the features you spent time setting up? That’s where you see the difference.
True tool adoption isn’t about compliance; it’s about integration. When your team starts using Jira to communicate, problem-solve, and plan without being prompted, you know you've succeeded. It has become part of their natural work rhythm.
To really gauge this, you have to track actual usage patterns. For instance, tools like WhatPulse can offer privacy-first insights into application usage, showing you how much time your team actually spends inside Jira versus other apps. This data helps you figure out if Jira is the central hub for work or just another item on a to-do list.
Identifying Friction Points and Refining Training
Once you start getting data on how your team uses Jira, you can spot where they're getting stuck. Are they consistently ignoring certain fields? Are some workflow transitions never used? These aren't user failures; they're signals that your setup is confusing or your training missed the mark.
Common Friction Points to Look For:
- Underused Features: If you rolled out a new issue type and nobody is using it, find out why. Maybe it’s poorly named, or the team just doesn’t understand its purpose.
- Inconsistent Data Entry: Are story points logged sporadically? Is your label field a chaotic mess of similar terms? This usually points to a need for clearer standards and better training.
- Workarounds: If you spot teams managing dependencies in a spreadsheet or discussing updates in Slack instead of Jira comments, it’s a giant red flag that Jira isn’t meeting their needs.
By pairing structured permissions with real adoption metrics, you create a powerful feedback loop. You can use the data to find the friction, then tweak your configuration or offer targeted training to fix those exact pain points. This is how Jira stops being a rigid system and becomes an evolving asset that genuinely helps your team get things done.
Here are some of the questions I hear all the time from teams getting to grips with Jira. These aren't just about clicking the right buttons; they're about bending the tool to fit the messy reality of how work actually gets done.
Let's dig into some practical answers for the hurdles most people hit.
How Do I Handle Projects That Do Not Fit a Strict Agile Methodology?
This comes up a lot. The good news is, Jira is incredibly flexible. For projects that are less structured or follow a hybrid model, a Kanban board is almost always the best place to start. It’s built for continuous flow, not fixed-length sprints, making it perfect for teams like support or operations where work is a constant stream.
You can begin with a dead-simple workflow: 'To Do', 'In Progress', and 'Done'. To keep the bigger picture in view, you can still use epics to group related tasks. For those hybrid approaches, you can even enable the backlog feature on a Kanban board. This lets you plan upcoming work without having to commit to the formal ceremony of sprints.
Actionable Step: For a hybrid project, use a Kanban board but create "Version" releases in Jira. Use a custom "Target Version" field on your tasks to group work into informal monthly or quarterly delivery cycles, giving you a lightweight roadmapping tool without the overhead of sprints.
The key is to make Jira match your team's real process, not the other way around.
What Is the Best Way to Manage Cross-Project Dependencies?
Ah, dependencies. The classic headache, especially in larger companies. Your first and most important tool here is Jira's built-in Issue Linking. Using link types like 'is blocked by' or 'relates to' creates a clear, traceable connection between tasks, even if they live in totally different projects.
When you need a more powerful, visual overview, look at Advanced Roadmaps (available in Premium and Enterprise). It gives you a cross-project timeline that helps you spot those tricky dependency chains and potential bottlenecks before they derail your plans.
A practical tip: don't rely on the tool alone. Combine Jira's features with a human process. Hold regular cross-team syncs where dependencies are a standing agenda item. Use a shared dashboard or a dedicated Confluence page to track the most critical links so nothing ever falls through the cracks.
How Can I Prevent My Jira Instance from Becoming Overly Complicated?
Jira 'clutter' is a very real problem. Over time, it can slow down performance and just make the whole thing confusing for everyone. The only way to stop it is to establish clear governance from day one.
Here are a few practices that make a huge difference:
- Limit Configuration Access: Be selective about who can create new custom fields, workflows, and issue types. This single step prevents the uncontrolled sprawl of configurations that nobody ever uses.
- Regularly Archive Old Projects: If a project is finished, archive it. This is a simple action that can seriously improve your instance's performance and make searching for relevant information much faster.
- Conduct Periodic Audits: Set a recurring reminder to review your customisations. If a custom field or status hasn’t been touched in a year, it’s probably time to clean it up.
- Encourage Backlog Grooming: Get your teams into the habit of regularly closing out old, irrelevant tickets in their backlogs.
Putting a dedicated administrator or a small 'Jira Steering Committee' in charge of this periodic cleanup ensures your instance stays lean, efficient, and easy for everyone to navigate.
Understanding how your team truly interacts with Jira is the key to refining your processes and getting the most from your investment. WhatPulse provides privacy-first analytics to show you exactly how work happens, helping you spot adoption gaps, reduce tool friction, and make data-driven decisions to improve your team's flow. Learn how to get real insights from your tool usage at whatpulse.pro.
Start a free trial