Install the software on Windows
The WhatPulse Professional software for Windows is simple to install. Check out the step-by-step instructions below. If you'd like to install WhatPulse using the command prompt, check out the last chapters on this page.
Installation steps
- Navigate to the Downloads page.
- Click the Download for Windows button.
- Open the downloaded whatpulse-win-latest.exe file. The WhatPulse Professional Installer Setup window opens.
- In the WhatPulse Professional Installer Setup window, follow the prompts to complete the installation.
- Click "Yes" on the User Account Control popup that asks permission to run the installer.
- Select all the default options for the NPCAP Installer.
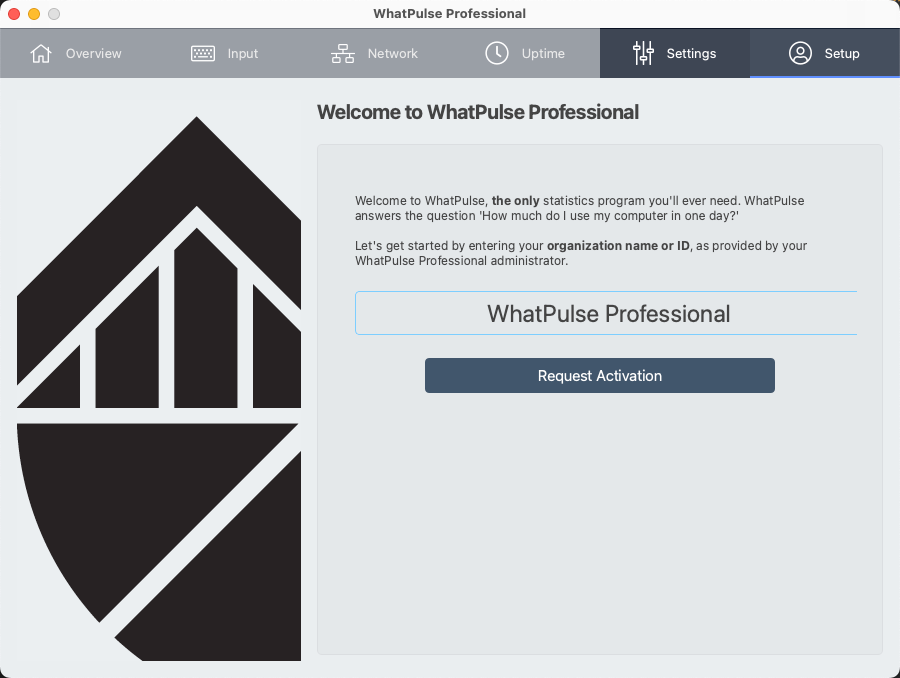
After you complete the installation and enable system permissions, you are greeted by the welcome screen. Now, you can enter your organization name or ID.

Activating Computers
By default, computers that have just gotten the software installed will be listed as Pending computers. WhatPulse Professional organization owners and admins can activate computers and link them to a user account. See this article that explains how to activate computers.
Automated deployments
There are two options for automated deployments: using the WhatPulse installer, or using an Microsoft Installer (MSI). Both install the same WhatPulse software, so it solely depends on your needs and deployment infrastructure on which option is best.
Installing via MSI
- Navigate to the Downloads page.
- Click the Download MSI button.
- Load the MSI into your deployment software & install it onto the target computers.
- The MSI installs WhatPulse Professional for all users, and it adds a startup item so that the software starts for all users on this computer.
- To have this WhatPulse installation automatically activate, create a file called
wp-pro-org-id.txtin the root directory (%programfiles%\WhatPulse\wp-pro-org-id.txt).- The contents of that text file has to contain your organization name or ID.
- This will allow the software to be installed fully autonomously, and it will automatically show up in the WhatPulse Professional dashboard as a pending computer.
- When WhatPulse starts, it will automatically connect to the WhatPulse Professional dashboard and show up as a pending computer. Check out this article on how to activate the new computer.
Installing via the installer command prompt
To make the installation process more efficient, the installer allows you to install WhatPulse with just a single command in the Windows terminal. Please follow the steps below:
- Navigate to the Downloads page.
- Click the Download Installer button.
- Open a Windows terminal by pressing Win + R, typing cmd, and pressing Enter.
- Navigate to the directory where you have downloaded the whatpulse-win-latest.exe file.
- Run the following command to install WhatPulse:
whatpulse-win-latest.exe --root "%programfiles%\WhatPulse" --accept-messages --accept-licenses --confirm-command install- By default, WhatPulse installs for the current user. To install WhatPulse for all users on the computer, you can add a
InstallForAllUsers=trueparameter, like this:whatpulse-win-latest.exe --root "%programfiles%\WhatPulse" --accept-messages --accept-licenses --confirm-command install InstallForAllUsers=true
- Wait for the installation process to complete. Once finished, you can close the command prompt.
- To have this WhatPulse installation automatically activate, create a file called
wp-pro-org-id.txtin the root directory (%programfiles%\WhatPulse\wp-pro-org-id.txt).- The contents of that text file has to contain your organization name or ID.
- This will allow the software to be installed fully autonomously, and it will automatically show up in the WhatPulse Professional dashboard as a pending computer.
- When WhatPulse starts, it will automatically connect to the WhatPulse Professional dashboard and show up as a pending computer. Check out this article on how to activate the new computer.
That's it! You have successfully installed WhatPulse using the command line.
When you are using remote deployment tools, download the latest WhatPulse installer to a central file repository from where the remote computers can retrieve it for their installation.
You can also override default settings (i.e. opening the window on startup) using a file called settings-overrides.ini. Find more details about settings-overrides.ini here.
Shared Computers
When using shared computers where multiple users log in, it is possible to run WhatPulse for each user separately.
- Install WhatPulse for all users or via the MSI.
- Create a file called
wp-pro-org-id.txtin the WhatPulse installation directory (i.e.,%programfiles%\WhatPulse\wp-pro-org-id.txt).- The contents of that text file have to contain your organization name or ID.
- Start WhatPulse once, to let it connect to whatpulse.pro.
- Assign a user account on whatpulse.pro to this computer. This can be a general name, like
reception@company.tld.
- Assign a user account on whatpulse.pro to this computer. This can be a general name, like
- WhatPulse starts with every user login, and will use the organization name or ID present in the text file.
- The software will open its window, but no action is necessary to get it to log in and start collecting statistics.
Currently, statistics on the computer side are per user. However, the web portal stats for these computers are accumulated into a single user (reception@company.tld). In the future, statistics will be separated into the computer users on the website as well.