Managing computer tags
Tags help you categorize and organize your computers, making it easier to filter and manage them effectively. For example, you can group computers by department (e.g., "Marketing," "Engineering"), by usage type (e.g., "Workstations," "Servers"), or by location (e.g., "New York Office," "Remote Workers").
Additionally, tags can help create teams of computers, allowing you to compare WhatPulse data between teams for performance analysis.
This guide will walk you through adding, editing, and filtering computers using tags.
Adding and Managing Tags
To manage tags for a computer, follow these steps:
-
Navigate to the computer edit page
- Open the WhatPulse Professional dashboard and go to the list of computers in your organization.
- Click on the edit icon of the computer you want to manage tags for to open its edit page.
-
Using the tag editor
- Inside the edit page, locate the tag editor.
- Start typing a tag name to see autocomplete suggestions for existing tags.
- Click on an existing tag to add it, or press Enter to create a new tag.
- Repeat this process to add multiple tags.
-
Saving tags
- After adding the desired tags, click the Save button.
- The assigned tags will now be linked to the selected computer.
Viewing and Filtering Computers by Tags
Tags make it easy to find and filter computers based on specified criteria.
-
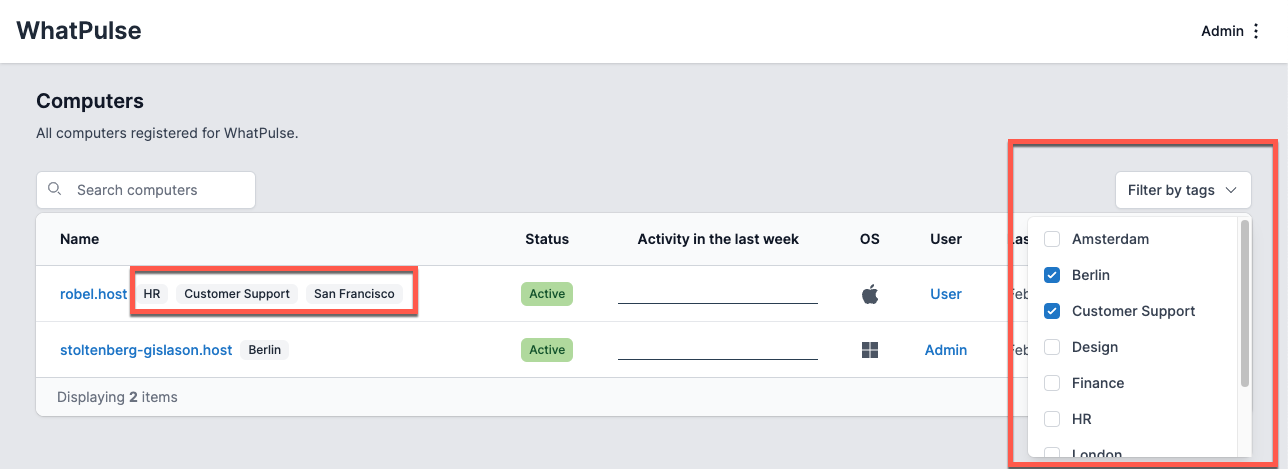
Viewing tags on the computers page
- In the computer overview, each computer’s assigned tags are displayed alongside its hostname.
-
Filtering computers by tags
- At the top right of the overview page, click Filter by tags.
- Select one or more tags from the list.
- The overview will update to show only the computers that have the selected tags.
Using tags, you can efficiently group computers by department, purpose, or any other classification that suits your workflow.